DTF printing mistakes can derail a project before it even leaves the shop. As DTF transfers gain popularity for apparel decoration, many teams encounter a familiar set of issues that affect print quality, durability, and color accuracy. The good news is that most of these DTF printing mistakes are predictable and preventable with the right approach. In this guide, we cover common DTF printing mistakes and offer practical DTF printing tips to avoid them, along with DTF transfer troubleshooting steps. You’ll learn actionable strategies on design prep, material choices, printer and press settings, powder adhesion, and post-press care to minimize DTF print quality issues and to avoid DTF errors.
From here, the discussion shifts to direct-to-film process missteps, transfer faults, and production pitfalls that can still derail results. These terms reflect related concepts such as DTF missteps, transfer faults, and print quality challenges, guiding readers toward practical fixes. Using contextually related phrases helps align content with Latent Semantic Indexing (LSI) principles and connects this topic to DTF transfer troubleshooting, printing tips, and quality-control routines. The goal remains the same: to help shops tame variability, optimize materials and settings, and deliver durable, vibrant garments.
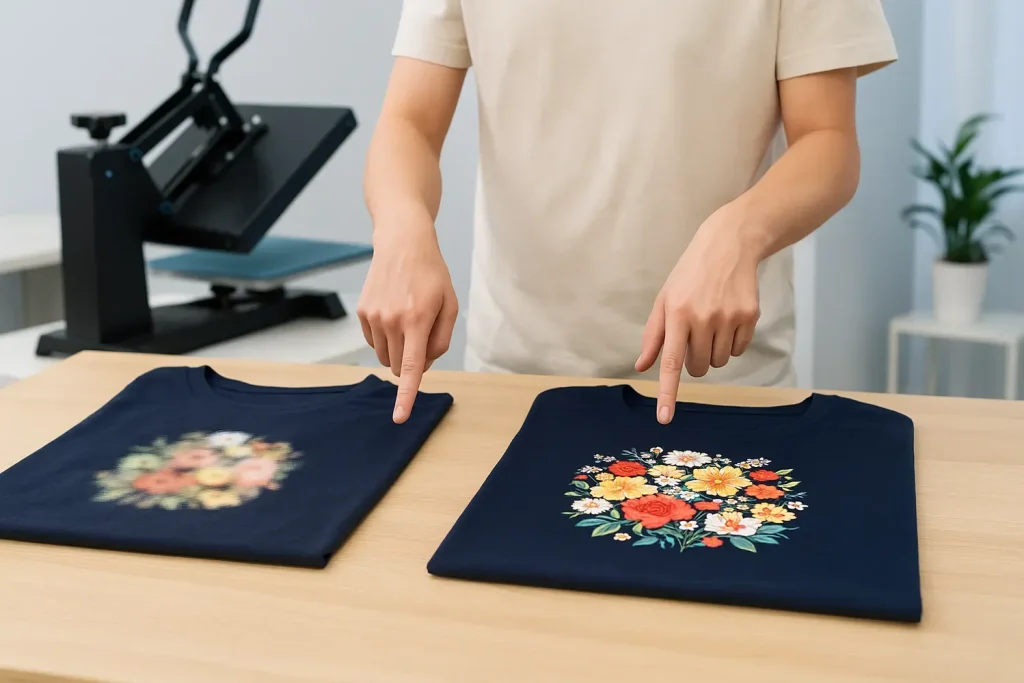
DTF Printing Mistakes: Recognizing and Preventing Common Errors
DTF printing mistakes can derail a project before it even leaves the shop. This guide highlights the most frequent errors that impact print quality, durability, and color accuracy—ranging from prepress missteps to powder adhesion issues and heat-press timing.
Preventing these mistakes starts with a controlled workflow: perform a deliberate prepress to remove moisture, use recommended adhesive powders and films, and ensure design files are prepared with accurate bleed and color management. By identifying these pitfalls early, teams can reduce waste, shorten production cycles, and maintain consistent results across batches.
DTF Transfer Troubleshooting: Quick Diagnostics and Fixes
When transfer problems arise, a fast, methodical diagnostic approach saves time and materials. Start by confirming film compatibility, verifying powder fusion, and checking the garment prep for lint or moisture. Poor adhesion, halos, or misregistration often point to a single root cause that can be addressed with a targeted fix.
Put practical fixes into your routine: re-bake or fuse the powder if adhesion is uneven, adjust heat press temperature and pressure, and reprint a small test garment to validate changes before committing to a larger run. Keeping a concise log of issues and resolutions helps your team recognize recurring problems and apply proven corrections quickly.
DTF Printing Tips for Consistent Results from Design to Press
Consistent outcomes begin with strong design preparation and color management. Use high-resolution artwork, ensure proper bleed, and design in a color-managed workflow to minimize surprises in print color and saturation. Previewing colors in the printer’s profile reduces the risk of dull or misregistered results.
From there, follow a reliability-focused production path: calibrate printers with accurate color profiles, select appropriate print modes and DPI, and conduct small test prints before mass production. These DTF printing tips help bridge the gap between design intent and final appearance, supporting cleaner edges, better color fidelity, and fewer reprints.
Mitigating DTF Print Quality Issues: Materials, Films, and Ink Selection
DTF print quality issues like halos, ghosting, or uneven release often start with material choices. The transfer film, gloss, and substrate compatibility influence color vibrancy and clarity. Low-quality films or mismatched media can create halos, ghosting, or poor film release, so selecting reliable combinations is essential.
Mitigate these issues by testing film/ink combinations across common fabrics (cotton, poly blends, dark textiles) and keeping notes on which pairings deliver the best color fidelity and wash durability. Once you identify strong combinations, standardize them in your workflow and document any adjustments for future batches.
Calibrating Equipment and Workflows for Reliable DTF Production
Reliable DTF production hinges on precise calibration and a stable workflow. Regularly calibrate color profiles, verify alignment with test targets, and maintain printers to prevent nozzle clogging and color drift. Consistency in print mode and DPI ensures predictable output and reduces rework.
Develop a documented standard operating procedure that covers design prep, material selection, film compatibility, powder handling, and press settings. Routine maintenance, staff training, and periodic audits help sustain control over every step and keep DTF printing aligned with quality goals.
Quality Control and Post-Press Care for Durable DTF Decor
Quality control is the last gate before shipment. Implement a small test print routine for every new design, film, or garment color, and inspect adhesion, edge quality, and color accuracy. Conduct wash tests after a short aging period to verify durability and note any color loss or cracking.
Post-press care completes the process: ensure garments cool properly, store finished items in a clean, dry environment, and handle transfers gently to maintain adhesion. A disciplined post-press routine reduces damage in handling and helps you deliver consistently durable, vibrant results to customers.
Frequently Asked Questions
What are the most common DTF printing mistakes that lead to misregistration, and how can I avoid DTF errors?
Misregistration often comes from rushing prepress, inconsistent printer settings, or failing to calibrate. Use a controlled prepress (3-5 seconds at high heat) to remove moisture and flatten wrinkles; consistently calibrate color profiles and run test prints to confirm registration before full runs.
How can I use DTF transfer troubleshooting to fix fading colors and dull imaging in DTF print quality issues?
Start with strong color management: ensure correct color mode and ICC profiles, verify film compatibility, and calibrate the printer. Run small test prints to verify color accuracy, then adjust film/ink combinations as needed and perform regular printer maintenance to prevent color drift.
What DTF printing tips help prevent poor powder adhesion and uneven heat transfer?
Use high-quality adhesive powder and apply evenly with a dedicated shaker; bake or fuse powder per supplier guidelines; allow the powder to rest briefly before heat pressing; ensure even coverage and test different film/ink combinations for best adhesion.
Why do some transfers peel or crack, and what DTF printing mistakes contribute to poor adhesion and wash durability?
Peeling or cracking usually results from incomplete powder fusion, incorrect heat-press time or temperature, or fabric moisture. Follow supplier specs for heat, time, and pressure; calibrate the press for your fabric type; and perform wash tests to verify durability and fix issues early.
How can I apply DTF transfer troubleshooting to correct incorrect printer settings and workflow gaps?
Document a standard workflow and perform color-profile calibration, alignment checks, and consistent print modes and DPI. Conduct routine head maintenance and use test prints before new designs or films to catch issues early.
What steps are essential for prepress and garment prep to reduce DTF print quality issues?
Prepress garments to remove moisture (3-5 seconds) and ensure they are lint-free, clean, and dry. Align design during prepress, manage color correctly, and ensure you allow cooled transfers to rest before handling to avoid handling marks and wrinkles.
| Common DTF Mistake | Why it Happens | Prevention / Solution |
|---|---|---|
| Under- or over-prepress of garments | Moisture and wrinkles caused by skipping or rushing prepress | Controlled prepress: 3–5 seconds at high heat to remove moisture and flatten wrinkles before applying transfer |
| Using poor-quality adhesive powder or improper powder application | Powder quality and uneven application lead to weak adhesion and flaking | Source recommended powders from trusted suppliers; apply evenly using a dedicated shaker or sifter; bake or fuse the powder per guidelines |
| Inadequate design preparation and color management | Low-resolution artwork, incorrect color profiles, or missing bleed | Start with high-resolution designs; use the correct color mode (usually RGB for design work, with careful ICC management for printing); run test prints to verify color accuracy before mass production |
| Uneven powder adhesion and incomplete fusion | Powder sits in clumps or is not evenly fused | Ensure even coverage, remove excess powder, and follow through with the recommended fusion/curing process |
| Poor material selection and film quality | The transfer film, gloss, and texture of the media influence color vibrancy, clarity, and release | Choose a reliable transfer film and compatible media; test different combinations to identify the best fit for your designs |
| Incorrect printer settings and workflow gaps | Printing at too low a resolution, wrong DPI, or improper color separation causes prints that look washed out or misregistered | Calibrate printers with color profiles; use appropriate print modes, and perform regular test runs to confirm registration and color accuracy |
| Inadequate heat press time, temperature, and pressure | Pressing too long or at the wrong temperature can degrade colors or damage fabrics; too little pressure or time leads to incomplete transfer | Follow supplier specs, start from a tested baseline (for example, around 160°C for 10–20 seconds with medium pressure) and adjust based on fabric type and ink behavior; peel hot or cold as recommended |
| Lack of quality checks and testing | Skipping test prints or real-world wear testing can hide problems until late in the cycle | Build a small test print routine into every batch; check print fidelity, adhesion, and wash durability on representative garments |
| Poor garment prep and post-press handling | Residual lint, wrinkles, or humidity can ruin a transfer after pressing | Ensure garments are lint-free, clean, and dry; allow cooled transfers to rest before handling; store finished items properly |
Summary
DTF printing mistakes are common during the learning curve of this versatile decoration method, but they are also avoidable with careful preparation, disciplined workflows, and ongoing transfer troubleshooting. By focusing on the key factors—design quality, material compatibility, precise printer and film settings, even powder adhesion, and controlled heat pressing—you can minimize DTF print quality issues and deliver durable, vibrant results. With the right mindset and a tested process, you can transform frequent DTF printing mistakes into a reliable, repeatable production system that consistently meets customer expectations and builds your reputation for quality.